Experiment Templates
Experiment templates can be set up to streamline data collection while maintaining flexibility for each experiment's data capture.
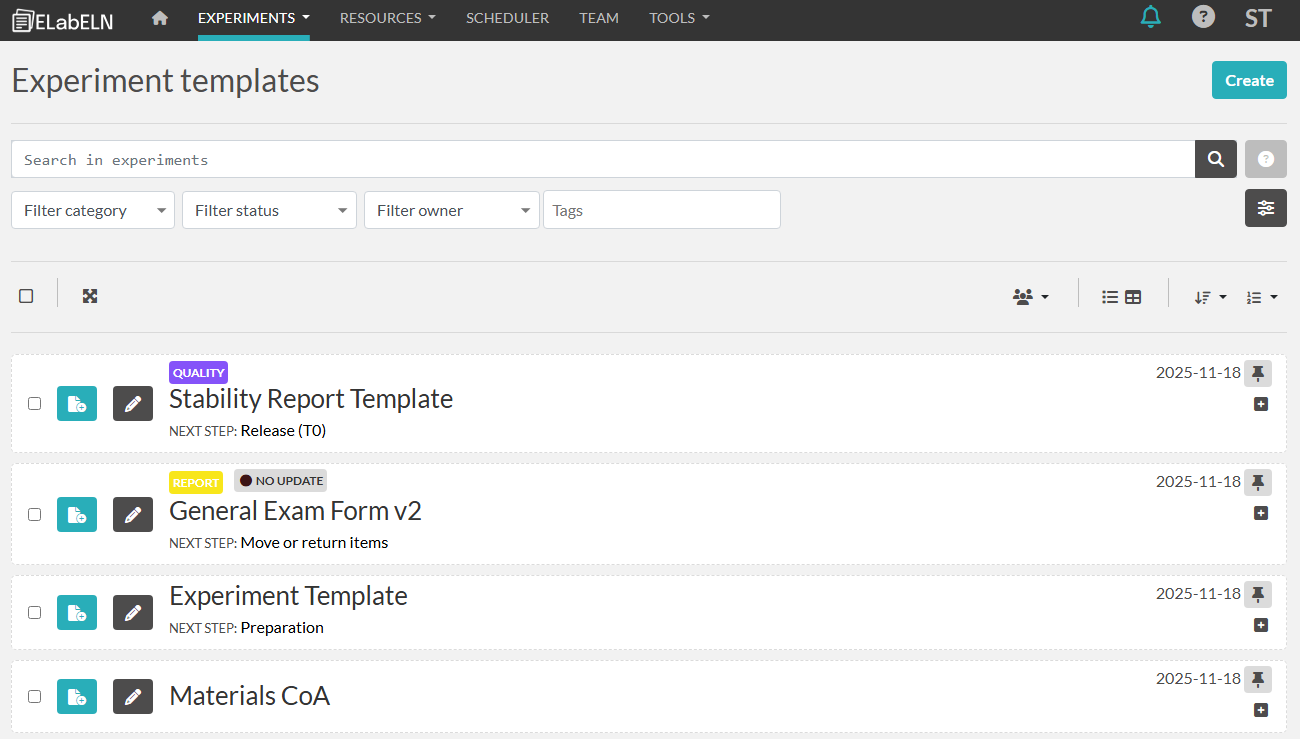
From the templates page, you can search, filter, and change the view of the templates similar to the experiments list screen. Clicking the pencil button will open the template for editing. You can also create a new template by clicking create.
On the edit screen, there are several ways to set up data capture:
1. Experiment Category
The Experiment Category is used to categorize experiments. This category can be used to filter experiments while searching. You can edit the category by clicking on Add Category just above the Template Title.
2. Experiment Status
You can leave the state as "Not Set" for the template so that the status for new experiments must be set manually. If you want the status for new experiment to be automatic, choose that status in the template.
You can edit the category by clicking on Add Status just above the Template Title.
3. Template Title
You can edit the template title by clicking to open it. This name is what users will see when selecting which template to start their experiment with.

Just below the title, you will see another set of symbols with various functions:
- Back to list
- Create Experiment from this template
- View Mode
- Duplicate template
- Add Signature
- Adding your signature will cryptographically sign the content of this entry, and the signature will be stored alongside the content at the time of signature, in an archive, visible as attachment (masked by default because archived).
- Timestamp
- Timestamping an entry will create an irrefutable proof that the data was present at this point in time. You can timestamp an entry as many times as necessary: an immutable timestamp archive will be created each time, and stored as attachment. With Trusted Timestamping (RFC3161), a cryptographic hash of your data is sent to a trusted third party. They reply with a token containing the current time, and they sign the token with their private key.
- Add to blockchain
- Timestamping an entry will create an irrefutable proof that the data was present at this point in time. You can timestamp an entry as many times as necessary: an immutable timestamp archive will be created each time, and stored as attachment. With Blockchain Timestamping, the cryptographic fingerprint of your data is added to a blockchain that is impossible to modify. This function uses the Bloxberg Consortium blockchain based on Ethereum.
- Export
- PDF File
- ZIP Archive
- ELN Archive
- CSV File
- QR Code
- JSON
The toggle lock is another feature used to prevent others from editing the template. Only the person who sets the lock or admins can unlock the template for editing.

4. Tags
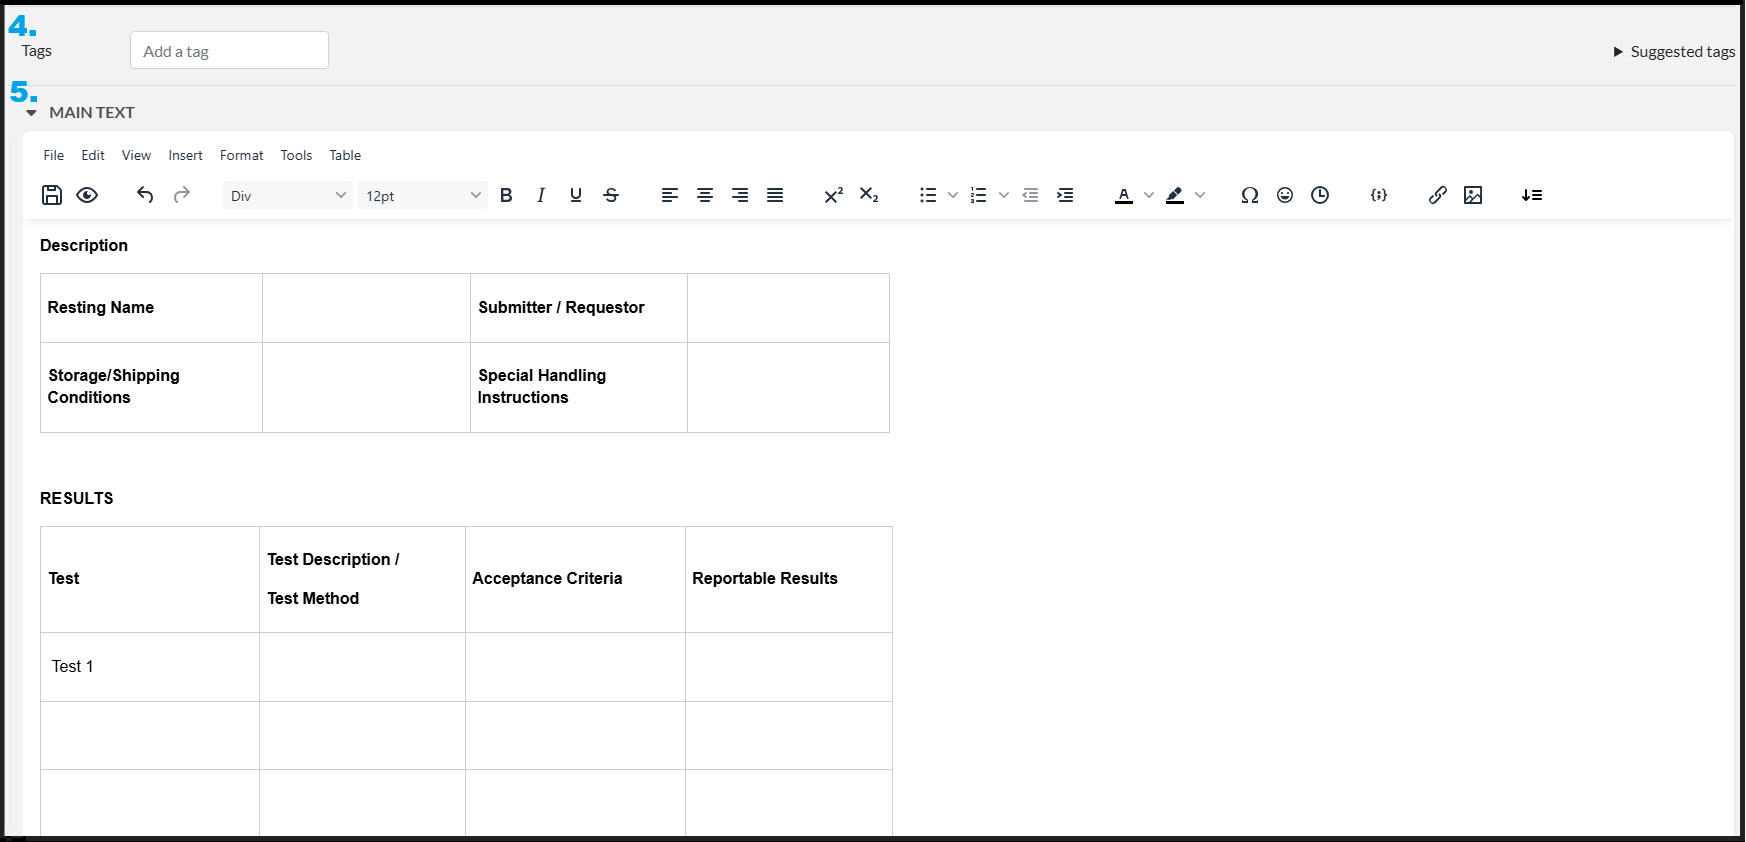
5. Main Text
The main text field includes a variety of options for tracking data. Click each tab to see additional formatting abilities: File, Edit, View, Insert, Format, Tools, Table.
Note: if you import experiments using an excel sheet, the excel sheet can include the name of the experiment and any information you want displayed in the main text area.
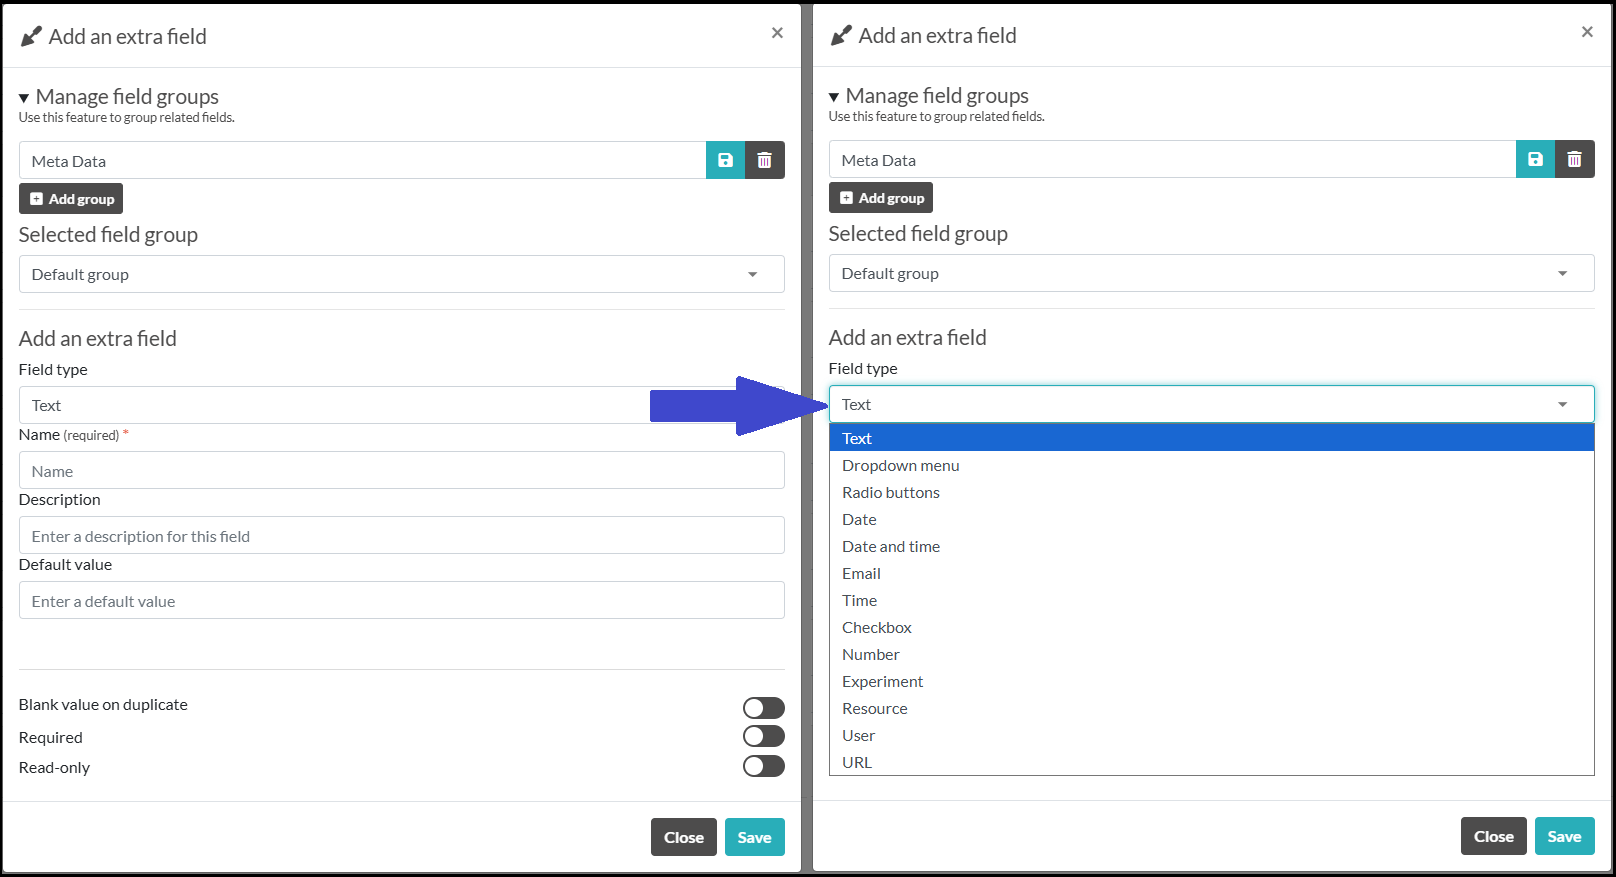
6. Extra Fields
You can track meta data via specific fields below the main text. These fields can be grouped together for organization.
When creating a new field, you can select the group, type of field, name of the field, any description, and enter in selection choices for dropdown menu or radio buttons.
You can also choose:
- Whether data in that field is copied to a new experiment.
- Whether that field is required.
- Whether that field is read-only (not editable).
You can also Load Fields from other Templates to reduce time in repeating fields you have set up for other templates.

7. Attached Files
Any files can be uploaded to the template to be automatically included in experiments created from this template. Files can be versioned and archived as needed.

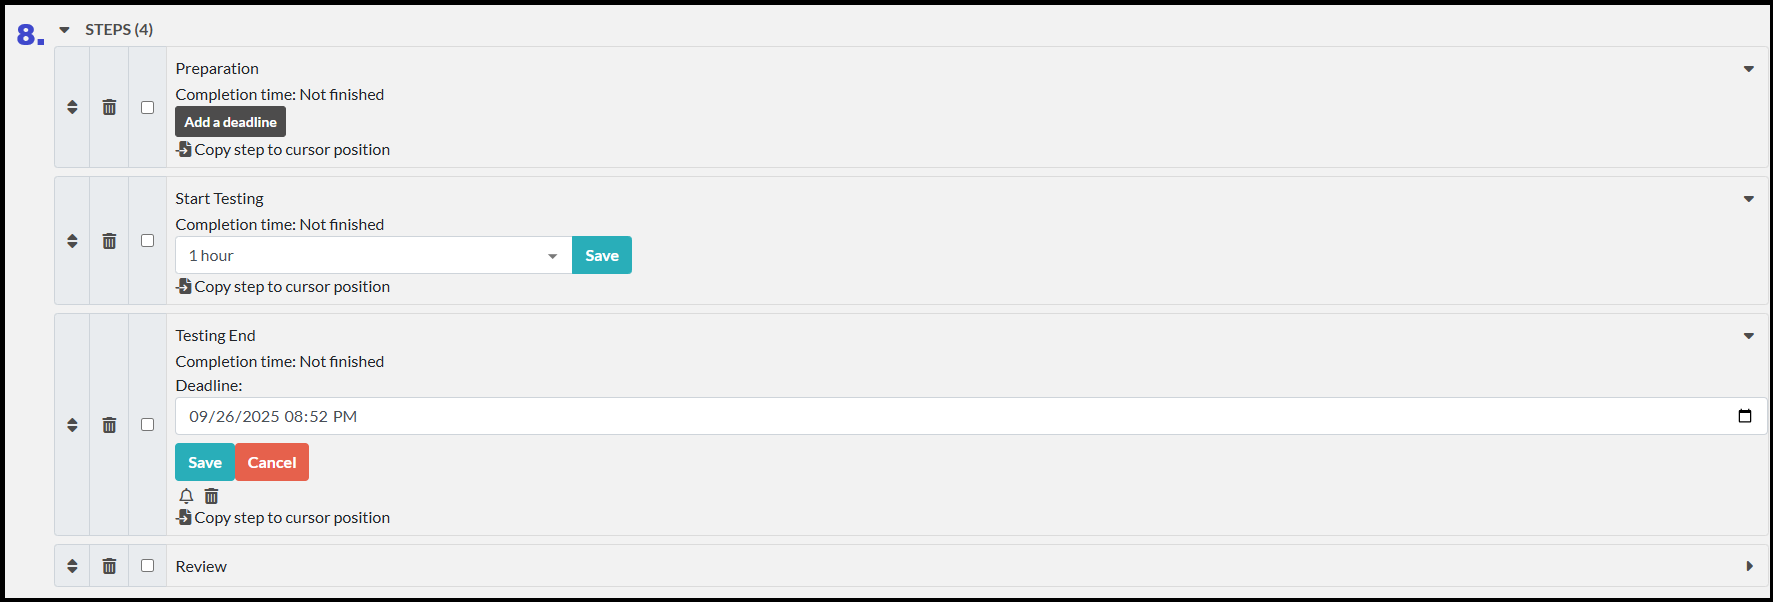
8. Steps
Steps can be added to the Template and edited for each individual experiment.
Steps can be used to track sequential workflows or to set deadlines for upcoming tasks.
Once you set a deadline, you can edit the information to a specific day and time, as well as turn on the notification using the bell symbol.
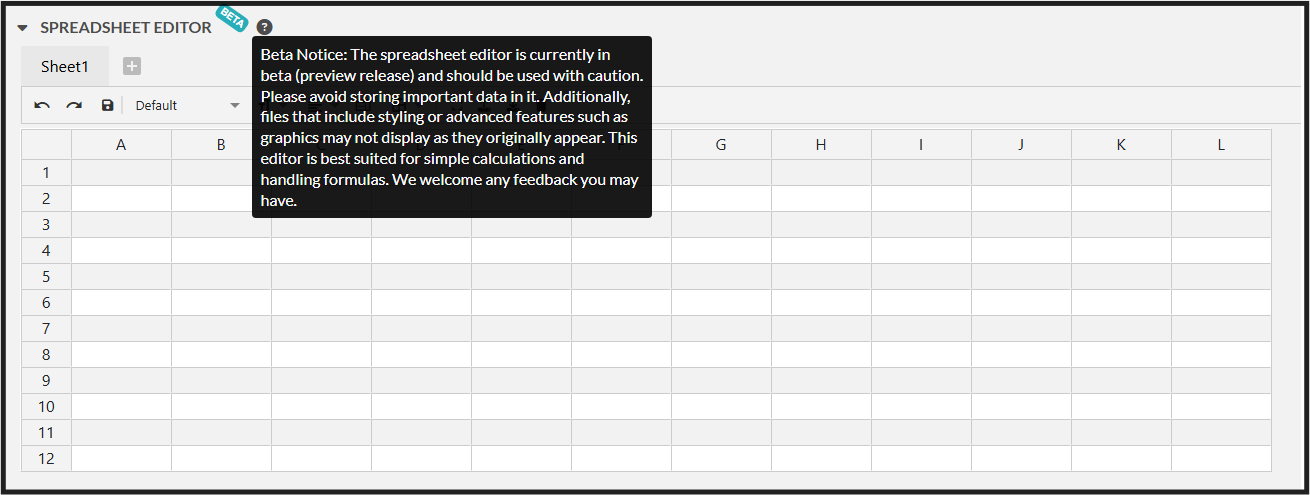
*Coming Soon: Spreadsheet Editor
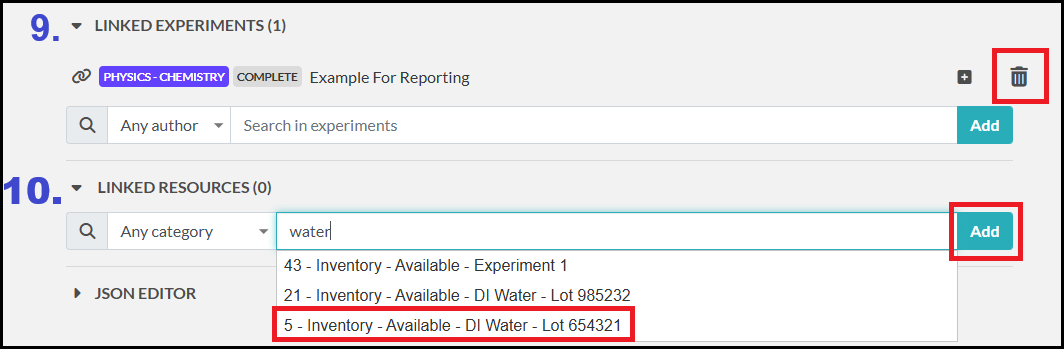
9. Linked Experiments
Admins can set experiments to automatically link to any experiment created from this template.
Or users can link individual experiments once created.
To link an experiment, start typing the title of the experiment in the field and select the correct option and click Add.
To delete a linked experiment, click the trash can next to it.
10. Linked Resources
Admins can set any resource to automatically link to any experiment created from this template.
Or users can link individual resources once created.
To link a resource, start typing the title of the resource in the field and select the correct option and click Add.
To delete a linked resource, click the trash can next to it.
11. Compounds
The compounds section gives you the ability to link compounds that have been imported into the ELN from PubChem. You can view the warning symbols and additional information.

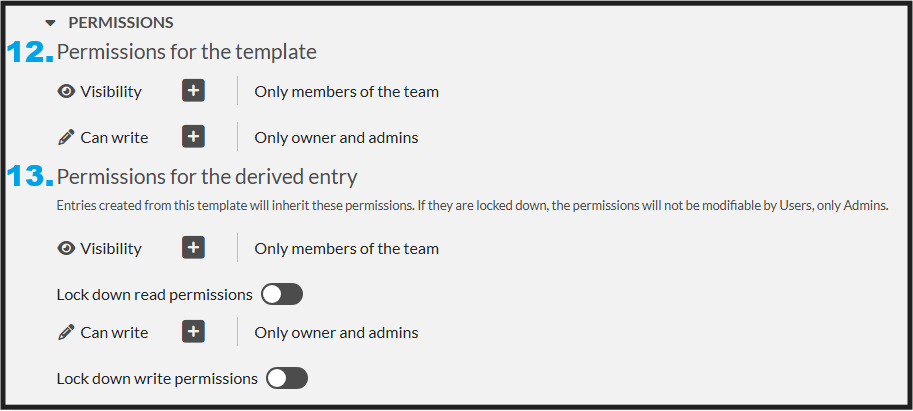
12. Permissions for the Template
Permissions for the experiment template are to set permissions for who can see the template and who can edit the template.
13. Permissions for the Derived Experiment
Permissions for the Derived Experiment are to set permissions for who can see the newly created experiments and who can edit that experiment. The template can lock the permissions for derived experiments so that the permissions can not be changed.